Landing and Internal Pages
Landing Pages
Landing Pages are the first pages of a section on your website. As noted in the Red Requirements, all of the pages that are links in your main navigation bar should use either the Landing Page template or any of the other templates that are not the Default template.
In Type A websites, the header image is set as 1440 px x 600 px. Type B websites have the option of using a header image with a size of 1440 px x 166 px or no image, in which case preset images will load randomly on the page.
In addition to the header image options, the Landing page header area includes required Subtitle and Body text fields.
Landing Pages can also be set as the "home" of a sub-unit.
Setting the Page template Heading link
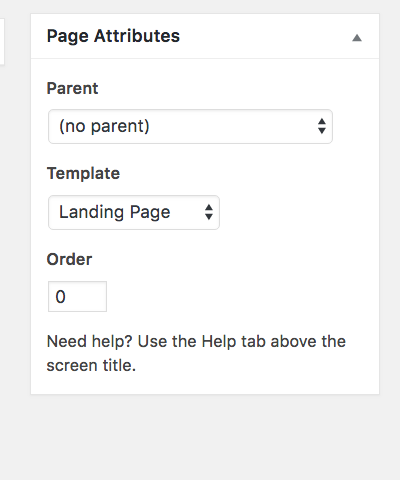
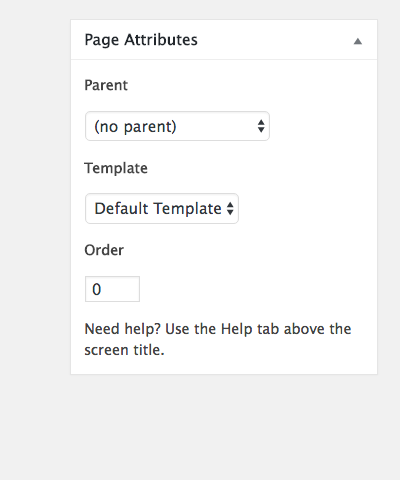
In order to identify your page as a Landing page, you need to change the template for your new page. All pages are set by default as “Default Template” which is used for basic internal content pages.
When you add a new page that will be a Landing page, go to the Page Attributes > Template and select “Landing Page” from the drop-down menu. You do not need to change the Parent attribute since the default setting of (no parent) sets the home page as parent, the appropriate setting for your Landing page.
Learn about Sub-unit / Nested websites
Enabling Page Privacy Heading link
Users can set pages (not including the Splash or Homepage) to be viewable only to visitors with UIC NETID credentials. When the feature is activated, users can set individual pages to be hidden behind a UIC NetID authentication wall.
Follow the instructions below, but be aware that ANYONE with a UIC NetID can access these pages and the restriction cannot be curated to specific UIC NetIDs. Also, the Homepage and Splash page CANNOT be hidden behind a NetID Authentication.
- Navigate to your Red website administrator dashboard at webdomain.uic.edu/wp-admin.
- Within the Dashboard left sidebar, select Page Restrictions
- Select the Restrict to Logged in Users tab at the top of the page.
- On this tab, find the box titled Page Restrict Options on the right side of the window and select Redirect to Login Page to enable this function for your site.
- Navigate to the individual page(s) that should require login and scroll in the main content section of the page to the Require NetID Authentication box and uncheck the “Require user to be logged in with a NETID to view this page” box.
- On the same page, navigate to the Page Restrict Access block on the right side of the page and select (check) the Require Login box, then Save or Publish the page.
Internal Pages Heading link
Internal pages — which use the “Default Template” — are basic content pages that have a Landing Page as their “Parent” page. Select the appropriate Parent page in the Page Attributes settings on the page in order to build out the breadcrumbs on the page. This page is an example of an Internal page.
These pages do not use header images at the top of the page. Similar to Landing pages, there is an “Intro Text” element, with optional subtitle and image fields, and a required text field.
Other page templates include Contact Page, Directory Page, News Listing, Event Listing and more. Each template has unique characteristics and components customized for its intended content.