9. Setting Your Main Menu
In carrying on with the theme of Site Navigation/User Flow, RED has simplified the process of setting your visitor’s visual navigation through the Menus tab. Menus are important to user flow as they provide pathways for the visitor to find the information they need. By setting the Main Menu, you will create an easy and organized way for visitors to navigate your site.
Main Menu Overview Heading link
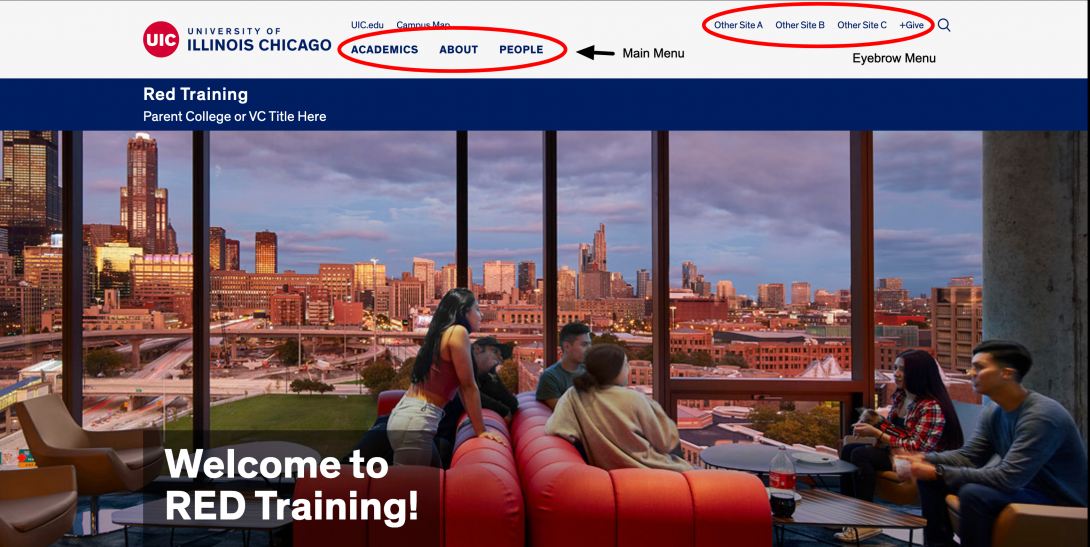
In the Menus section of the RED CMS, you can edit what pages will appear within the top header section (either the “Main Menu” pages or the “Eyebrow” links) as well as what appears in your footer (this only applies to sites with “Mega Footers”).
By editing the “Main Menu” you will create positions for the Landing pages within the header, as well as drop downs for the 1st level of sub-pages that the visitor can access by hovering over the particular Landing page listing.
See the image above for the Main Menu and Eyebrow locations.
How to Set the Main Menu Heading link
Within the Main Menu, you can select which area you want to edit. The Main Menu and Eyebrow are associated with the top header of the site. Also under the Menu Settings: Quick Links 1,2,3 and Button apply to the Mega Footer listings (from left to right).
When setting the Main Menu, please realize that only the first level of sub-pages (the pages beneath the parent Landing pages) will be revealed to visitors by hovering over the buttons on the live site. RED does not allow for sub-sub-pages to appear in the drop-downs to visitors.
Do NOT use a Home link in your Main Menu, the Site Name in the blue bar below the menu is the link back to your site home page.
Do NOT stop adding to the main menu with each new page you create, even if it is a sub-sub-page. The Main Menu is what also sets the side navigation within the site, so with the creation of each sub-page (and sub-sub-page thereafter), please continue to place each page within the Main Menu.
To add existing pages or custom links to your eyebrow menu (as external links should not be placed in the Main Menu), please follow these four easy steps:
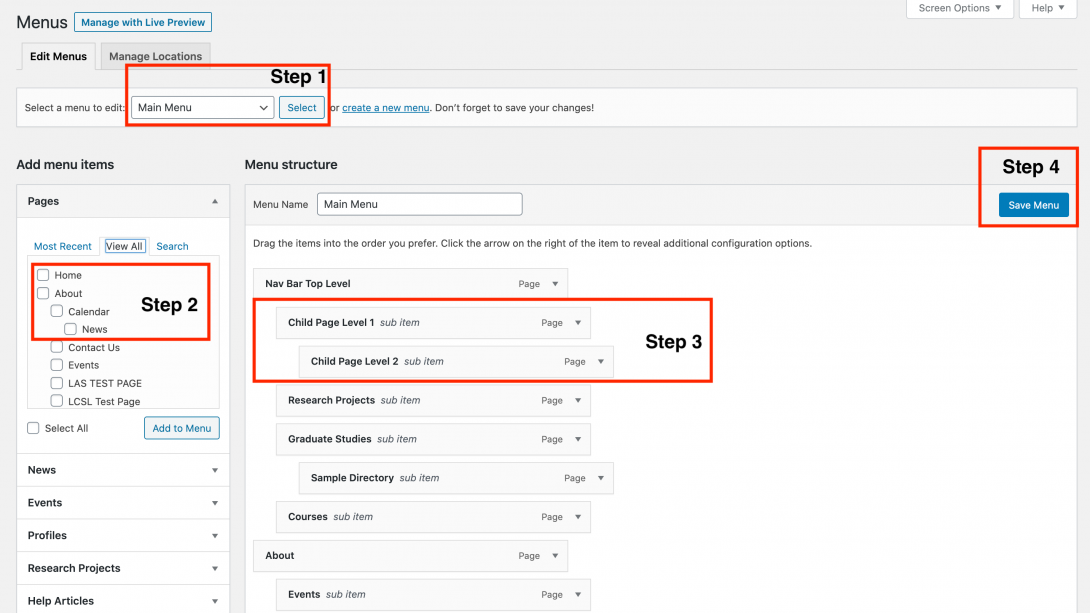
Step 1: Choose the proper menu you want to edit (or create a new menu – for each of the Mega Footer positions) and click select. If you select “Eyebrow Menu,” or create any of the Mega Footer link locations, feel free to incorporate custom (external) links. DO NOT USE EXTERNAL (CUSTOM) LINKS IN THE MAIN MENU.
Step 2: Underneath the Pages area (or Custom Links area for footers and eyebrows) select the check-boxes next to the existing pages displayed and then click on “Add to Menu.” A placard should now appear for each new page (or custom link) you’ve added at the bottom of the “Menu Structure” area.
Step 3: Inside the “Menu Structure” area, drag and drop the particular page/custom link into the desired position according to site hierarchy (keeping in mind that by indenting a page placard here, it will set that page as a sub-page to the one above it that is “less” indented).
Step 4: Click on “Save Menu.” We know that sounds simple, but if you forget to do this, all of your work/changes will be lost.
The main menu and the footer Heading link
To add items to your menus, follow these steps.
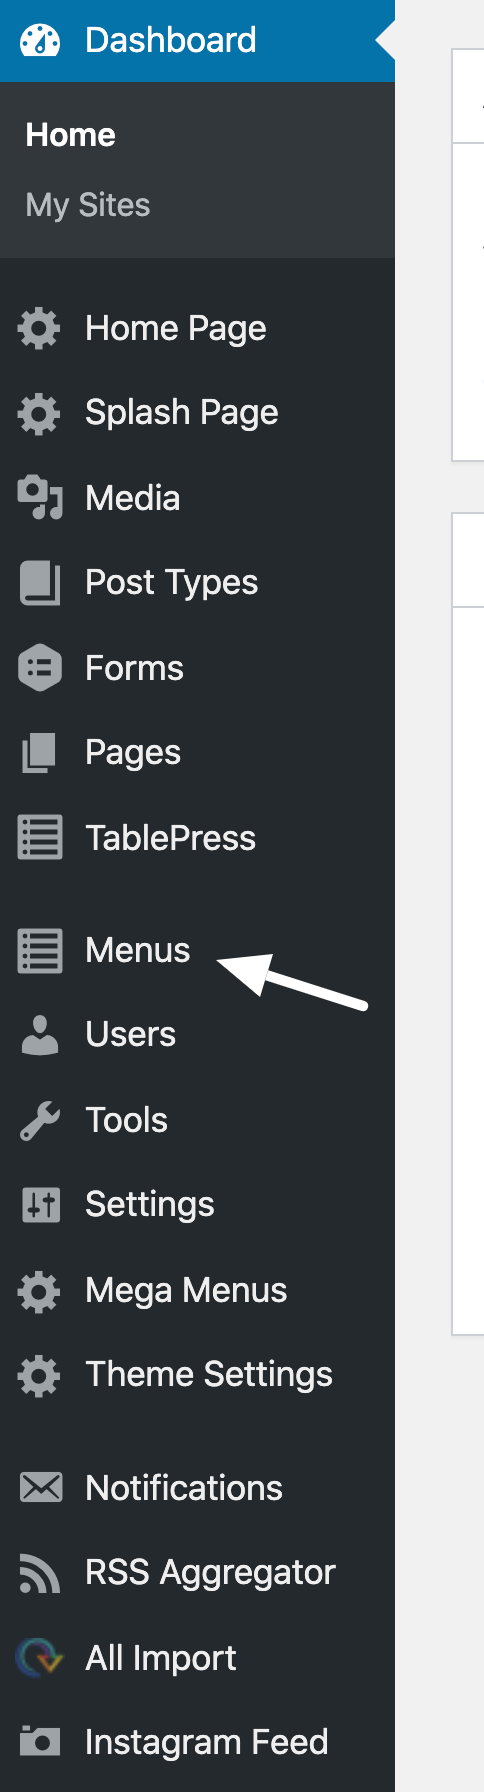
- In the Menus area of the Dashboard, choose from the drop-down which menu you plan to edit and click select. For new Footer menus, “click create a new menu.”
- Select the check boxes to add existing pages. Note: the custom link option is available for eyebrow or footer menus only. Do not add external links to the Main Menu.
You can also select custom post types for the menu in the individual sections below pages. - Drag and drop the specific page/post/link into the desired position in the menu. Indenting the particular link sets it as a sub-item in the menu.
- Save the menu — it does not auto-save.
If your site employs a Mega Footer, you will need to “create a new menu” for the footer (a new menu for each of the quick links and button menus that are housed in the Mega Footer). By creating a menu for each of the different columns within the Mega Footer you will be able to create and determine where the links appear in the Mega Footer. Otherwise, if you assign the quick links or button menu to your Main Menu, then it will simply be regurgitating what is already displayed in your header – this would not be practical to visitors.